Screen printing (also called silkscreening or serigraphy) is a printing technique that uses a fine mesh to transfer ink onto a surface (substrate) through a stencil. A blade called a squeegee is moved across the screen to force ink through the open areas and onto the item below. Each color in a design requires its own screen and pass. The result is a thick, durable layer of ink that yields vibrant, opaque prints. This versatile method works on many materials and is still popular today because of its rich color output and long-lasting durability, especially in industrial applications.
Screen Printing vs Digital Printing: Unlike digital printing (which sprays ink directly from a computer file), screen printing is a stencil-based process. Screen printing applies ink layer by layer, requiring separate screens for each color, whereas digital printing (including DTG and inkjet) can print full-color photographic images in a single pass without setup. As a result, screen printing can produce thicker, more vibrant colors (since heavy ink deposits yield richer saturation). Digital printing, however, easily handles complex gradients, fine details and on-demand designs. In practice:
- Screen Printing: Uses specially formulated inks that can be very opaque. Great for bold graphics and spot colors. Ideal for high-volume runs once setup is done.
- Digital Printing: Uses thin ink layers from printheads. Excels at photographic or multi-color prints and small batches, but often costs more per unit in bulk.
Despite new technologies, screen printing remains widely used in modern manufacturing. It is cost-effective for large quantities and can be applied to almost any surface – from textiles to electronics – which ensures its continuing popularity. The adaptability of screen printing (with specialty inks and special effects) and its proven reliability make it a dominant printing method in many industries.
How Does Screen Printing Work?
Screen printing relies on a simple principle: a stencil (also called an emulsion) blocks certain areas of a mesh screen, and ink is pushed through the open mesh onto the substrate. A flood stroke fills the screen with ink and a squeegee stroke then presses the ink through the mesh onto the material. This process is repeated for each color, aligning each screen precisely to build up a multi-colored image.
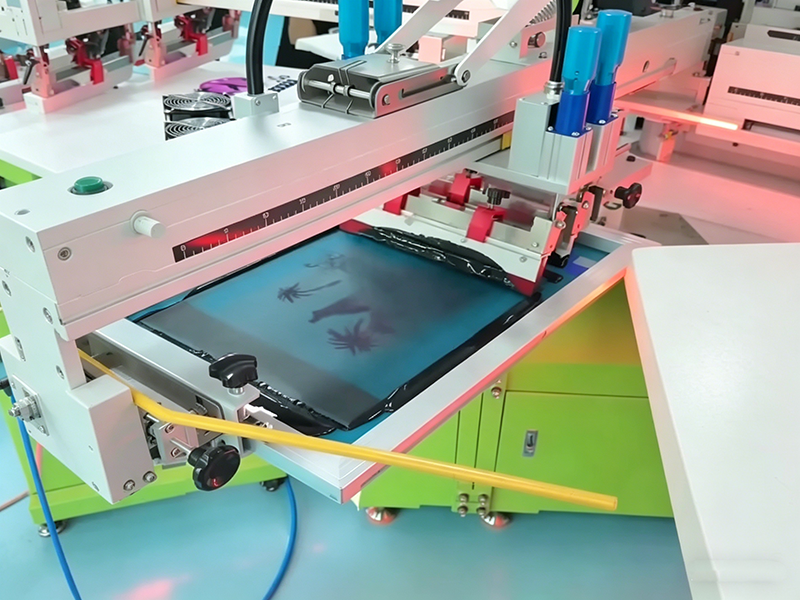
In screen printing, a squeegee is used to force ink through the mesh screen onto the substrate. Each color of the design uses a separate screen stencil.
Basic Principle of Screen Printing
At its core, screen printing is like stenciling. A mesh screen is stretched over a frame and coated with a photosensitive emulsion. A film positive (the artwork) is placed on the emulsion and exposed to bright light. The emulsion hardens except where blocked by the artwork, creating a stencil of the design. When ink is applied and a squeegee is pulled across the screen, ink penetrates only those mesh openings that correspond to the design. Each pass of ink adds one color. When printing is complete and cured, the result is the intended image on the underlying material.
Key Components in Screen Printing
Successful screen printing requires a few main pieces of equipment:
- Screen (Mesh Frame): A wooden or metal frame onto which a fine mesh (often polyester) is tightly stretched. The mesh holds the emulsion stencil. Screens come in different mesh counts (threads per inch) chosen by the level of detail and ink flow needed.
- Stencil (Emulsion): A light-sensitive coating applied to the screen. When exposed to UV or bright light under the film positive, the emulsion hardens except where blocked by the design. The unexposed emulsion is washed away to “open up” the stencil.
- Ink: Specially formulated screen printing inks are used, which can be plastisol, water-based, or UV-curable. The ink is poured on the screen and pushed through by the squeegee. Inks are chosen based on substrate (fabric, plastic, metal, etc.) and desired finish.
- Squeegee: A flat rubber blade set in a handle. The operator drags or floods the squeegee across the screen to push ink through the mesh. Squeegees come in different hardness (durometer) and sizes to control ink thickness and coverage.
- Substrate: The material being printed on (t-shirt, paper, metal plate, glass, etc.). The substrate is placed under the screen; ink is transferred directly onto it where the stencil allows. Many substrates are suitable for screen printing, making it very versatile.
Together, these components form the screen printing setup: the mesh screen with stencil, the ink, and the squeegee to transfer the ink onto the substrate.
Step-by-Step Screen Printing Process
Screen printing involves several preparation steps before the actual printing. Each stage is essential for a crisp, high-quality print. Below is a detailed walkthrough of the typical process:
Step 1 – Create the Design
First, design your artwork digitally. Convert it to a high-contrast image with solid areas for each color. Then print the design onto a transparent acetate film (often called a “film positive”) using an inkjet or laser printer. This clear film will be used to create the stencil. As Deadline Apparel explains, “a printer takes the design and prints it out onto a transparent acetate film. This will be used to create the stencil”. Make sure the image is crisp and fully opaque where ink should pass; very thin lines or gradients should be avoided for simplicity.
Step 2 – Prepare the Screen
Choose the right screen mesh count based on design detail and ink type. Thicker inks and bold designs use lower mesh counts (coarser mesh), while fine detail requires higher mesh counts (finer mesh). Clean the screen thoroughly and secure it on a flat surface or press. Mask off the edges of the screen to prevent ink leakage. Then coat the screen with photo-emulsion. As Deadline Apparel advises, “the mesh screen is then coated with a layer of light-reactive emulsion, which will harden when developed under bright light”. Apply a smooth, even coat on both print and ink sides of the screen using a scoop coater, and let the emulsion dry in a dark, dust-free area.
Step 3 – Apply Emulsion (Coat the Screen)
If more ink deposit is needed in the final print, additional coats of emulsion can be applied. For example, Anatol recommends using a thick, smooth application: “One coat of emulsion to the print side of the screen and then to the ink side with a scoop coater… Apply one coat … with firm, even pressure”. Let the coated screen dry completely and remain protected from light. The end result is a screen covered in a sensitive emulsion that will form your stencil.
Step 4 – Expose the Screen
Place the transparent film with your design onto the emulsion-coated screen, aligning it carefully. Then expose the screen to a bright light source (UV lightbox or even a strong lamp). The light will harden the emulsion everywhere except under the opaque areas of your design on the film. As Deadline Apparel describes, during exposure “the acetate sheet is laid onto the emulsion-coated screen, and the whole thing is exposed to a very bright light. The light hardens the emulsion, so the parts of the screen which are covered by the design remain in liquid form”. Expose for the recommended time (often 5–15 minutes) depending on the emulsion. The result is that the image areas block the light and stay unhardened.
Step 5 – Wash Out the Design
After exposure, rinse the screen with cool water. The unhardened emulsion (under the design) will soften and wash away, leaving a clear mesh in the shape of your design. Deadline Apparel explains: “After the screen has been exposed to light, the areas of the screen not covered by the design will have turned hard. Any unhardened emulsion is then carefully removed. This leaves a clear imprint of your design on the screen for the ink to pass through”. Continue rinsing until the stencil design is sharp and all loose emulsion is gone. Dry the screen thoroughly; now you have a finished screen ready for printing.
Step 6 – Print the Design
Set up the screen on the printing press. Place your clean substrate (e.g. T-shirt) flat on the platen under the screen. Lower the screen onto the substrate and apply ink just above the screen. Then pull or push the squeegee firmly across the screen to flood the design with ink and force it through the open mesh onto the material. Deadline Apparel details this: “Ink/paint is added to the top end of the screen, and a squeegee is used to pull the ink along the full length of the screen. This presses the ink through the open areas of the stencil, imprinting the design on the product underneath”. Lift the screen and reveal the printed design. For multi-color prints, repeat this process with a new screen (and ink color) for each layer, carefully realigning the prints (registration) between passes.
Step 7 – Cure and Dry the Ink
Finally, the printed ink must be cured (dried) to fix it permanently to the substrate. This usually involves heat. For plastisol inks, this means passing the item through a dryer or conveyor oven at around 300–330°F (150–165°C) for a short time. Water-based inks often require hotter, longer drying to evaporate water. As Deadline Apparel notes, “After printed, the product passes through a dryer, which ‘cures’ the ink and creates a smooth finish”. Proper curing ensures durability. Once cured, the substrate (shirt, poster, etc.) can be handled normally – the print is complete.

Types of Screen Printing Techniques
There are several screen-printing methods suited to different effects and goals:
- Spot Color Screen PrintingEach solid color in the design is printed separately through its own screen. Spot-color printing yields very bright, opaque colors and clean edges. It works best for simple graphics, logos or text. Caydo explains: “Spot color screen printing uses separate screens for each color in a design. Each layer applies one solid color of ink, making this style ideal for simple graphics with clean lines.”. Because inks are pure and not overlaid, spot colors are extremely vibrant and easy to match (e.g. Pantone inks). However, spot color printing becomes impractical for designs with many colors. In fact, it’s “not cost-effective for many colors; struggles with gradients or photo realism”.
- Halftone (Process) PrintingHalftone printing is used to simulate shades and gradients using dots. Instead of printing continuous-tone colors, the design is converted into a dot pattern where varying dot sizes create the illusion of lighter or darker tones. With halftones, a limited palette of inks (often just black or a few colors) can reproduce detailed images or photos. Caydo describes it: “Halftone screen printing breaks a design into small dots of different sizes. These dots blend visually to create shades, gradients, and even photo-like effects.”. This requires precise screen preparation (fine mesh, careful angles) but allows printing detailed artwork without needing a screen for every hue. Halftones are common in poster art, realistic t-shirt prints and any case where smooth color blends are needed.
- CMYK (Four-Color Process) PrintingThe CMYK process uses four ink colors – Cyan, Magenta, Yellow, and Key (Black) – in layered halftone form to create virtually any color. Essentially, it’s the same concept used in magazines: overlapping tiny dots of the four inks appear as full-color images. Caydo notes that “CMYK screen printing uses four colored inks… These mix in tiny overlapping dots, similar to how magazines are printed… It’s best for full-color images or accurate photographs”. Process printing works well on light-colored substrates (so the inks are not overpowered) and requires precise registration of all four screens. It allows photographic quality but tends to be more expensive (four screens per print) and is typically used when detailed realism is required and volume justifies the setup.
- Automatic vs. Manual PrintingManual (Hand) Printing involves a human operator doing the ink pulling and screen movement by hand (often on a simple carousel press). It offers flexibility and tactile control – you can tweak each print during the run. It’s ideal for very small batches or one-off jobs. However, it is labor-intensive. Each color change requires manual setup, and running large orders by hand is slow and tiring. On the other hand, Automatic (Press) Printing uses motorized machines that handle the ink flooding, squeegee strokes, and garment indexing automatically. Automatics greatly increase speed and consistency. MSP Design Group notes: “An automatic screen printer offers a more consistent quality since it is automated. It can print 3,000–5,000 items per day… This means all products in a batch will look the same”. The trade-off is higher cost and required space. Automatics are chosen for high-volume runs (thousands of units), whereas manual setups are preferred for custom, very short runs.
Materials Used in Screen Printing
Common Substrates
Screen printing is notable for its versatility in materials. It can print on almost any flat or cylindrical object as long as you have the right inks and setup. Typical substrates include:
- Fabric (Textiles): By far the most common, especially cotton and cotton-blend T-shirts, sweatshirts, tote bags, etc. Screen printing is ideal for apparel because inks (especially plastisol and discharge inks) bond well with fibers.
- Paper and Cardstock: Posters, flyers, art prints, and packaging are often screen printed for vivid color. As noted by Caydo, screen printing works on fabric and paper, and can handle wood and glass too.
- Plastics: Plastic promotional items, signs, and labels can be printed (often with UV-curable or solvent-based inks). Many plastics accept specially formulated inks.
- Metals: Metals used in signage, nameplates, circuit boards, or decorative panels can be screen printed (typically with epoxy or UV inks). AWT notes that screen printing handles metals and other high-tech materials easily.
- Glass and Ceramics: Glass bottles, decorative glassware and ceramic tiles can be printed using certain inks (often UV-curable or ceramic frit inks).
In short, screen printing works on fabrics, plastics, metals, glass and more. Its ability to adapt to different materials is a major advantage.
Types of Inks
The choice of ink depends on the substrate and desired effect. Common screen printing ink types include:
- Plastisol Ink: A PVC (polyvinyl chloride) based ink that remains liquid until heated. Plastisol is the classic textile ink – it sits on top of fabric fibers, giving bright, opaque coverage. It never dries on its own in the screen (so you can leave it overnight), but it must reach about 300–330°F (150–165°C) to “cure” (solidify). It’s user-friendly and durable, making it the go-to ink for garments and opaque prints.
- Water-Based Ink: Uses water as the main solvent, with pigments or dyes suspended. Water-based inks soak into the fabric, creating a softer hand feel (the print is not noticeable to the touch) and better breathability. Because they rely on water evaporation to cure, they often require longer drying or use of a flash cure unit. Water-based inks are favored for high-quality apparel prints (often in eco-friendly or soft-wash finishes). They typically produce less vibrant color on dark fabrics without special treatment.
- Discharge Ink: (a variation of water-based) Water-based inks that chemically strip out the fabric’s dye and replace it with pigment. This yields very soft, vintage-style prints on dark garments.
- UV-Curable Ink: These inks contain photoinitiators that polymerize (harden) when exposed to ultraviolet light. As Anatol describes, “UV inks cure under UV light… The inks… contain a photoinitiator that, when exposed to UV light, releases free radicals that enable… the ink to bond, creating a solid image”. UV inks sit on top of the substrate and are ideal for printing on non-porous surfaces (glass, plastics, metals). They cure almost instantly and release no volatile solvents, allowing very fast production. Today UV screen inks dominate industrial printing (60–65% of U.S. screen ink sales).
Other specialty inks exist (like solvent-based, silicone, or glitter inks) for specific effects, but the three above are the most common. Each ink type will require the correct curing method (heat oven for plastisol/water-based, UV unit for UV ink) to set properly.
Advantages of Screen Printing
Screen printing offers several key benefits:
- Vibrant, Opaque Colors: Because it applies a heavy layer of ink, screen printing produces brilliant, highly saturated colors. Each layer can be very opaque, even on dark backgrounds. AWT notes that “thicker application of ink… results in richer, more vibrant colors” than digital methods. Special inks (metallic, neon, glitter, puff, etc.) can also be used for striking effects.
- Exceptional Durability: Screen prints are very tough. The thick ink layer withstands repeated laundering, abrasion, and UV exposure. According to AWT, screen-printed images “can be used outdoors and in other harsh environments without fading or wearing”. In practice, a properly cured plastisol print can survive decades on a T-shirt without cracking. (Merchology reports that prints will last as long as the garment itself – at least 50 washes.)
- Cost-Effective for Large Runs: Once screens are made, screen printing runs quickly. The process is highly repeatable and consistent, which means costs per item drop sharply at high volumes. AWT emphasizes that screen printing is “preferred for large quantities and long production runs” because of its stable, efficient workflow.
- Versatility in Substrates: As noted earlier, screen printing works on a wider range of materials than most other printing methods. You can print on fabric, paper, plastic, metal, glass, wood, and even unconventional surfaces. This adaptability, along with the variety of inks available, makes screen printing suitable for countless applications.
- Custom Effects: Screen printing allows specialty treatments (e.g., puff printing for raised texture, high-density inks, discharge printing, metallics). It’s also easy to color-match (Pantone inks) and add layers like clear coatings for extra gloss or protection.
These advantages make screen printing the method of choice whenever high-quality, durable imagery is needed in quantity. It is particularly favored for apparel, signage, electronics printing, and large-scale graphic production.
Disadvantages of Screen Printing
Despite its strengths, screen printing has downsides:
- High Setup Cost: Preparing screens (especially for multi-color jobs) takes time and materials (frames, emulsions, films, etc.). The initial cost of making each screen makes short runs expensive. Small quantities may not justify the labor and materials needed. Butler Technologies points out that digital printing is “cost-effective for small to medium runs,” whereas screen printing only becomes economical for high volumes.
- Less Flexible for Design Changes: Once a screen is made, changing the design (or even correcting a small typo) means making a new screen. Digital printing easily accommodates last-minute edits or variable designs. Complex or multicolor artwork is harder to modify on the fly with screen printing.
- Not Ideal for Many Colors: Each color requires its own screen and press run. Designs with dozens of colors (like detailed photographs or very colorful artwork) become impractical. Spot-color printing loses efficiency when many inks are involved. In fact, an analysis notes that spot color screen printing “is not cost-effective for many colors; it struggles with gradients or photo realism”.
- Physical and Time Intensity: Traditional screen printing (manual presses) is labor-intensive and slower per unit than some automated or digital methods. Multi-color setups increase complexity (registration of multiple screens), requiring skilled technicians.
- Space and Equipment: A proper screen print shop needs room for screens, presses, dryers, washing stations, etc., plus safe ventilation. The initial capital investment in press equipment and exposure units can be high.
In summary, screen printing shines in high-volume and simple-color scenarios, but it is generally less cost-effective for very short runs, constantly changing designs, or photographic detail compared to digital or other printing methods.
Screen Printing vs Other Printing Methods
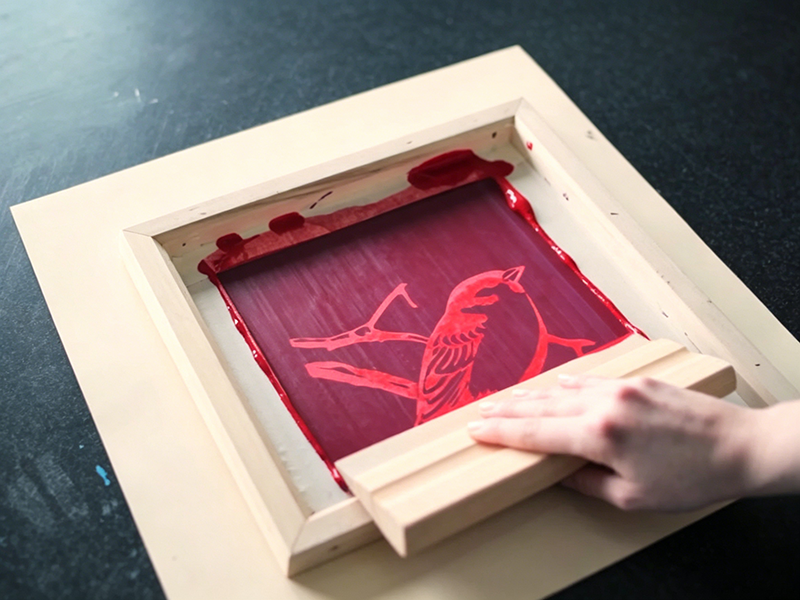
Screen Printing vs Digital Printing
- Setup and Volume: Digital printing has virtually no setup costs (no screens needed), making it ideal for quick turnarounds and small runs. Screen printing has higher setup but lower cost per item on large orders.
- Color and Detail: Digital inkjet or laser can produce complex multi-color images, gradients and photographs easily. Screen printing, by contrast, is best for bold solid colors and spot inks. As noted, screen printing “produces thick, opaque layers of ink” while digital uses thinner layers. This means digital wins on highly detailed or photographic art, whereas screen printing delivers superior brightness and texture for simpler designs.
- Durability: Screen prints are generally more robust. The heavy ink deposit bonds well with substrates, resisting wash and wear better than most digital prints. AWT notes screen printing’s durability advantage, especially with added UV or weather-resistant coatings. Digital prints can fade or peel under harsh conditions more quickly.
- Cost: For long runs, screen printing is more cost-effective overall (the upfront screen cost is offset by low per-unit ink usage). For one-off or short runs, digital often costs less because it avoids screen expenses.
- Materials: Screen printing can handle many materials, including uneven or textured substrates (like rough textiles, wood, or plastic), where digital printers may not work. Digital printing is usually limited to flat, smooth media of certain thickness or in specific machines.
- Specialty Inks: Screen printing supports specialty inks (metallics, fluorescents, thermochromic, conductive, etc.) that aren’t available in digital printing. Digital printing mainly uses CMYK pigment or dye inks.
Screen Printing vs Heat Transfer (Press)
- Durability: Screen prints typically outlast heat transfers. When screen printing, the ink sinks into the fabric and is cured in place, whereas heat transfers (vinyl or paper-based) sit on top. Caydo notes: “Screen printed ink soaks in and holds up longer. Heat transfers sit on top and can wear out faster.”. In practice, heat-transferred graphics often begin peeling or cracking after many washes, while screen prints remain intact.
- Feel and Appearance: Screen prints usually have a textured hand (you can feel the ink layer), which many consider high-quality. Heat transfer graphics can feel stiff or plasticky on garments. Screen printing also offers higher opacity and saturation.
- Cost and Volume: Heat presses require little setup (just a press machine and printed transfer), so they are extremely flexible for on-demand, single-item jobs. However, the price per print stays high regardless of volume. The Caydo guide illustrates that for bulk orders, heat press does not scale economically: it costs about the same per shirt at 25 or 500 units. Screen printing, while slower to set up, sees major per-unit cost reductions in volume. Thus, heat transfers win on small runs or irregular items (hats, mugs), but screen printing wins for large runs.
- Versatility: Heat press works best on flat surfaces and requires the item to fit the press. Screen printing can more easily adapt to various shapes (e.g. open-end garments, cylindrical objects with special devices) and a wider range of inks.
- Color and Detail: Heat transfers (especially digital transfers) can render photographic images and unlimited colors with ease, similar to digital printing. Screen printing is limited to the number of screens (colors) you make, so highly detailed multi-color artwork is more complex to produce.
In short, heat presses are convenient for custom, small-batch, or full-color photographic transfers, but screen printing yields more durable, vibrant prints on larger runs. As Caydo summarizes: screen printing gives “bold colors” and is cheap in bulk, while heat press is “better for detailed designs but costs more per piece”.
Common Applications of Screen Printing
Screen printing’s versatility leads to many applications:
- Apparel and T-Shirts: The most ubiquitous use. Custom printed T-shirts, hoodies, team jerseys, hats and sportswear are screen printed by the millions each year. Its ability to match corporate colors, print special inks (glow-in-the-dark, puff, discharge), and endure repeated washings makes it ideal for clothing. For example, Deadline Apparel notes screen printing is perfect for large batches of sports team uniforms and uniforms.
- Industrial and Safety Markings: Durable labels, control panels, automotive instrument faces, and machine markings often use screen printing with tough inks (e.g. epoxy, thermoset) that resist heat, chemicals and abrasion. Printed electronics (as part of flexible circuits, printed sensors, membrane switches) use conductive inks deposited via screen printing.
- Electronics and Circuit Boards: In modern manufacturing, screen printing isn’t just for fabrics. It’s used to apply solder masks, insulating layers, and even functional conductive traces on PCBs. AWT highlights printing on “printed circuit boards and biomedical sensors” as examples of screen printing’s reach.
- Promotional Products and Signage: Everyday promotional items—like tote bags, mousepads, caps, and mugs—are screen printed. Decals and stickers often come from screen printing. Large posters, banners and signs (especially those printed outdoors) are made via screen printing for longevity. Caydo notes that UV-curable inks are common for decals, nameplates, signage and automotive graphics, showing how screen printing serves advertising and display markets.
- Art Prints: Artists and printmakers have long used silkscreen for posters and fine art (famously used by pop artists like Andy Warhol). Limited-edition art prints (serigraphy) are still hand-pulled screen prints.
- Specialty Uses: Textile printing is also big: sportswear, home décor (curtains, upholstery), band merchandise, etc. Industry examples include printing on glass (bottles, panels) and wood (panels, furniture), where UV or ceramic inks are used.
Screen printing truly spans from fashion to factory. Its strength and flexibility explain why you’ll find it in art studios, garment factories, sign shops, and electronics plants alike.
Tips for High-Quality Screen Printing
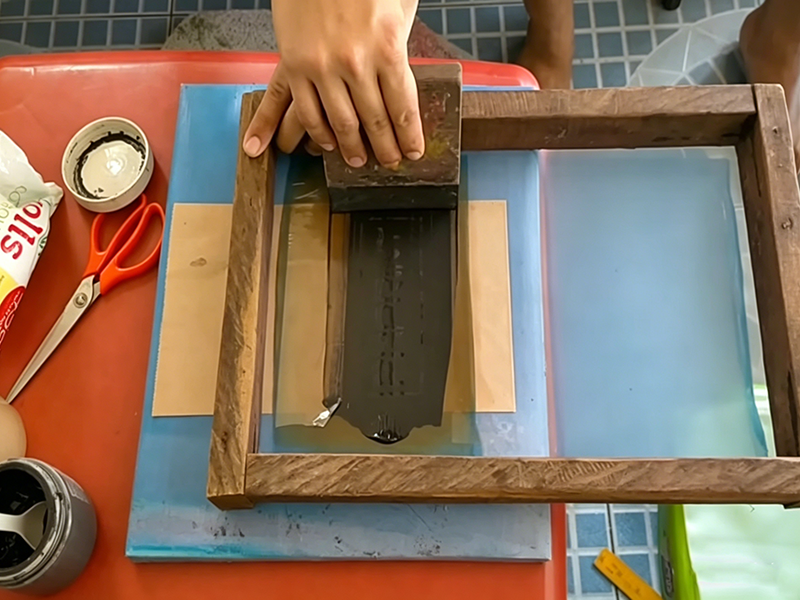
Achieving sharp, consistent screen prints requires attention to detail. Key tips include:
- Maintain Proper Mesh Tension: High, consistent tension in the screen mesh ensures fast snap-back (the screen springs back cleanly after a squeegee pass), resulting in sharp details and smooth ink laydown. Low tension causes sagging and ink smears. As Anatol advises, “high, consistent mesh tension ensures fast snap-off, clean ink release, sharp details, and smooth flooding”.
- Coat Screens Evenly: Apply emulsion in smooth, uniform layers. A thick, well-leveled coating makes a durable stencil. Use a scoop coater correctly and let the screen dry flat. If you need extra ink deposit, you can add another emulsion coat. Proper coating and drying prevents pinholes and washed-out areas.
- Cleanliness: Keep everything spotlessly clean. Any dust or ink clog in the screen will ruin prints. The printing area, screens, squeegees, even the ink cans should be wiped clean regularly. Anatol stresses this: even lint can end up in prints. Regularly reclaim screens with the right chemicals (and degrease them) to remove old emulsion. Clean shop practices greatly reduce misprints and ink waste.
- Ink Preparation: Before printing, mix the ink thoroughly (use an ink mixer if possible). Inks that have sat can separate, so remix them for uniform color and consistency. If needed, add additives to adjust viscosity or flexibility (a retarder for longer working time, or a reducer for thinner ink). Well-prepared ink prints more evenly.
- Proper Registration: Take time to align multi-color screens accurately. Use registration marks or tape guides. Misalignment means blurry or “ghost” images. Some printers do a test print with one color (often black) and rotate each screen to check alignment before running the full job.
- Controlled Curing: Follow ink manufacturer specs for curing. Over- or under-curing can ruin durability. It’s wise to monitor temperature: use test strips or a thermal thermometer to ensure the conveyor dryer or flash units reach the needed heat. Anatol suggests using temperature sensors or tape to verify curing conditions.
- Equipment Maintenance: Keep your presses, flood bars, and squeegees in good condition. A worn or bent squeegee gives poor ink deposition. Old screens should be replaced if they have holes or fraying. Well-calibrated press arms ensure even pressure and registration.
- Consistent Technique: When pulling the squeegee, use smooth, even pressure and speed. Inconsistent strokes cause streaks or uneven coverage. Practice a smooth motion: flood the ink across the screen, then use firm even pressure to print.
By controlling these variables – ink thickness, screen tension, cleaning, curing – you improve print quality and repeatability.
Summary
Screen printing is a versatile and widely used printing method that transfers ink through a mesh screen onto various materials. It is known for its durability, vibrant colors, and suitability for bulk production. By understanding the process, materials, and techniques involved, beginners and professionals alike can achieve high-quality results while choosing the right method for their specific needs.
FAQ
What is screen printing used for?
Screen printing is used for printing on garments and textiles (T-shirts, jerseys, hats, etc.), promotional items (bags, mugs, labels), and signage and graphics. It’s also used in industry – for example, printing electronic circuit boards and sensors, decals, industrial labels, and nameplates. Essentially, if it’s a flat or mildly curved surface, someone likely has screen-printed on it.
Is screen printing better than digital printing?
It depends on the application. Screen printing produces thicker, more vibrant prints that last longer, making it superior for bulk apparel and heavy-use graphics. Digital printing excels at quick, one-off jobs with complex color (including photographs) without setup time. For huge orders of a few spot colors, screen printing is usually better; for variable or highly detailed designs in small batches, digital is often better.
What materials can be screen printed?
Almost anything flat or cylindrical: fabrics (cotton, polyester, blends), paper and cardboard, plastics, metals, glass, and even wood or ceramic. Screen printing is noted for its adaptability. Studies show it works on fabrics, paper, wood, glass and many plastics. Metals are also commonly printed (e.g. instruments, labels), as well as specialty surfaces with the right inks.
How long does a screen print last?
When done correctly (with proper curing), a screen-printed design can last for years or decades. The ink bonds deep into the material. In garments, screen prints can endure 50+ wash cycles and beyond. Merchology notes that prints should “last as long as your T-shirt does” – at least 50 washes – when properly cared for. In harsh conditions (outdoors, heavy use), the right ink additives can make screen prints resist fading and wear remarkably well.
Is screen printing expensive?
The initial setup can be costly – you need screens, emulsion, and equipment – so small orders carry a high per-piece price. However, if you print in volume, the cost per item drops significantly. Once screens are prepared, each print is very fast and cheap in ink. Thus, screen printing is relatively expensive for short runs but very economical for hundreds or thousands of items.
Can beginners do screen printing?
Absolutely. There are many beginner kits and online guides available. Silk screen printing is considered one of the more accessible DIY printing methods. As Merchology explains, silk screen “is the most popular one – and the easiest one to do at home. It may seem daunting, but it’s simpler than you might think”. With a bit of practice, even novices can produce quality prints. Starting with a simple one-color print on paper or fabric and following step-by-step tutorials will yield great learning results.