Reamers are precision cutting tools used in machining to slightly enlarge and finish holes to exact dimensions.Unlike drilling, which creates the initial hole, and boring, which enlarges and straightens an existing hole, reaming is a finishing process that removes only a small amount of material to improve hole accuracy, roundness, and surface finish. After drilling, a hole is often slightly undersized; a reamer then passes through it to achieve the final size and a smooth internal surface. Reaming is especially important when tight tolerances and high-quality finishes are required, for example to ensure that shafts, dowel pins or bearings fit perfectly in their bores.
Reaming yields high precision and improved hole geometry. Typical results include improved diameter accuracy, better roundness, and a smooth internal surface finish. A well-chosen reaming operation can hold tolerances on the order of ±0.005–0.02 mm (±0.0002–0.0008 in), far tighter than drilling alone. It also evens out surface texture (often achieving Ra 0.8–1.6 µm), which reduces friction and ensures proper seating of mating parts. In short, reaming is a finishing step that corrects drilling imperfections: it takes a drilled hole that is “rough and basic” and transforms it into a precise, smooth bore suitable for tight assemblies.

What Is a Reamer?
A reamer is a multi‑fluted rotary cutting tool designed to refine an existing hole to a precise diameter and surface quality. In practice, you first drill a hole slightly under-size, then use a reamer to remove a minimal layer (typically 0.1–0.5 mm) and produce the final dimension. Because reamers have multiple cutting edges spread around the tool body, they cut evenly as they follow the hole; this improves roundness and cylindricity over what a single‑point drill can achieve.
The main differences between drilling, boring, and reaming are their purpose and material removal:
- Drilling creates the initial hole and removes a large amount of material. The result is a roughly accurate bore with relatively coarse surface finish.
- Boring (single-point cutting) enlarges or corrects an existing hole, often improving straightness and alignment. Boring removes a moderate amount of material to adjust size.
- Reaming is the final step: it removes a very thin layer (usually a few tenths of a millimeter) to achieve tight tolerances and a smooth finish.
In summary, drilling is fast but rough, boring improves size/shape, and reaming “polishes” the hole to precise dimensions. Reamers are therefore vital in precision machining: they fix the oversize and surface irregularities that drilling leaves behind, ensuring that mating parts fit without play.
Why Reaming Is Important in Machining
Reaming plays a critical role whenever hole accuracy and quality are important. Its benefits include:
- Improved diameter accuracy. Reaming brings hole size into very tight tolerance. After drilling, holes might be oversize or undersize; reaming corrects this with high consistency. Machinists often use reaming as the final step to meet the spec (e.g. H7 tolerance fits, bearing seats, pin holes).
- Better surface finish. A drilled hole often has rougher walls due to drill chatter and tool marks. Reaming produces a much smoother bore (for example, Ra ~0.8–1.6 μm), which is important for friction-sensitive fits (bearings, press-fits).
- Enhanced roundness and straightness. Multiple cutting edges of a reamer “average out” imperfections. The process tends to correct small geometric errors left by drilling: it improves roundness, cylindricity, and consistency along the depth. (However, note that a reamer follows the existing hole: it cannot fully correct a badly misaligned or tapered pre-drilled hole. The earlier drilling/boring must be fairly accurate.)
- Consistency across parts. By finishing holes in the same way each time, reaming yields more uniform results for multiple parts. This repeatability is essential in production for interchangeability of fasteners, pins, and components.
Because of these advantages, most precision hole-making operations will include reaming after drilling (and sometimes boring). A drilled hole alone cannot typically achieve the alignment and finish required by bearings, dowel pins, or tight-fitting shafts. Engineers often design assemblies with reamed holes specifically for alignment features, press fits, or dowel pins, relying on reamers to meet the needed tolerance. In short, reaming bridges the gap between a fast drilled hole and the final functional hole a part needs.
Main Types of Reamer
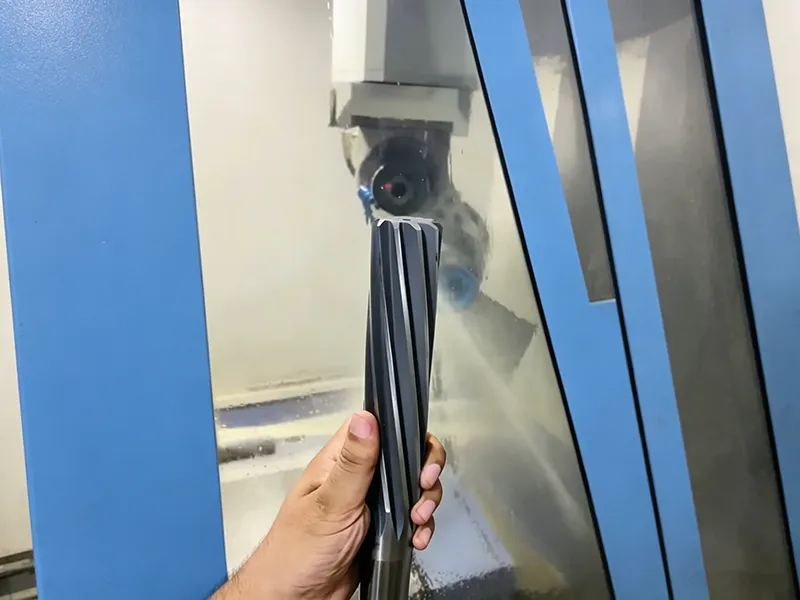
There are many specialized reamer types for different tasks. Below are some of the most common categories and their uses:
Hand Reamer
- Characteristics: Hand reamers have a square (or hex) shank end so they can be driven with a wrench or tap handle. The flutes usually have a long tapered lead-in to help start the tool by hand. They are designed for manual operation, not for power tools or CNC.
- Use Cases: Hand reamers are ideal for small, low-volume jobs or in-place finishing, such as enlarging a hole in a part that can’t be fixtured easily. For example, opening up a bushing in situ or servicing worn holes. They’re also used for quick one-off reaming where no machine setup is available.
- Pros and Cons: The long taper allows easy alignment by hand, but it means cutting only starts partway down the tool. Hand reamers are less rigid and less precise than machine reamers, and human error can cause inaccuracy. They should be used for light cuts only. A hand reamer generally shouldn’t be used to finish to very tight tolerance (for that, a machine/ chucking reamer is better). Importantly, a hand reamer cannot reach the bottom of a blind hole (since the taper prevents contact until fully inserted).
Machine Reamer
- Characteristics: A machine reamer (sometimes called a chucking reamer or chucker) has a straight (cylindrical or tapered) shank that fits directly into a machine chuck, collet, or toolholder. It has only a short lead-in chamfer at the tip. Machine reamers come with either straight or helical flutes.
- Use Cases: Designed for use in drill presses, mills, lathes, or CNC machines. They cut immediately upon contact and are intended for precision reaming operations, especially in production. For example, finishing engine block holes or alignment bores on a lathe.
- Difference from Hand Reamers: Machine reamers do not have the square drive or long taper of hand reamers. Instead, they rely on the machine for alignment. Because they engage immediately, they are more precise and faster. The tip usually has a 45° chamfer. In practice, “chucking reamer” and “machine reamer” are often used interchangeably. Machine reamers are preferred for maximum precision and productivity, whereas hand reamers are only for occasional use.
Chucking Reamer
- Definition: A type of machine reamer with a straight or Morse taper shank. The term “chucking reamer” specifically refers to any reamer that is held in a machine chuck or collet, and can have straight or spiral flutes.
- Features: The most widely used reamer type. The tip often has a chamfer for easy entry. Chucking reamers enlarge and finish pre-drilled holes to precise diameters and are run in lathes or mills.
- Applications: Common in CNC and manual machining for general hole finishing. For example, they are routinely used in automotive shops to ream holes in steering knuckles or tie rod ends to exact fitments. The flutes may be straight (for cast iron, etc.) or helical (for metal that produces long chips).
Adjustable Reamer
- Characteristics: Has an expandable head or sliding blades that can be set to different diameters (usually by screws or wedges). They look like a collar with multiple cutter slots that can spread apart slightly.
- Use Cases: Useful in maintenance, repair, or low-volume scenarios where you need flexibility. For example, if you don’t have the exact size reamer on hand, an adjustable reamer can be tuned to the needed diameter. They are also handy in toolroom or on-site work where inventory is limited.
- Notes: Adjustable reamers allow fine tuning of the size but are less rigid than solid reamers. They are generally used for rougher finishing or “free reaming” when slight variation is acceptable. They sacrifice some precision for versatility.
Expansion Reamer
- Characteristics: Similar to adjustable reamers but use a built-in mechanism (usually an internal screw or wedge) to expand the tool slightly. Turning the screw forces cutting edges outward.
- Use Cases: Great for small-batch work or in-field repairs where a single tool can cover a range of sizes. For instance, a mechanic may use an expansion reamer to correct an oversize hole without swapping tools.
- Difference from Adjustable: Both allow size changes, but expansion reamers usually expand uniformly by the screw and often in a more limited range (e.g. a few thousandths of an inch). They provide fine control and compensation for wear, but are generally not as rigid as solid reamers.
Taper Reamer
- Description: A reamer with a conical (tapered) cutting head. Common taper angles include standard Morse or Jarno tapers.
- Applications: Used to cut slight tapers or to finish tapered holes. For example, machine tool toolholders and spindles use taper reamers to refine the matching taper in the mating part. Also used for taper pin holes.
- Example: A Morse taper reamer ensures the spindle receives an accurate taper for toolholding. Tapered pins or tapered shafts often require reamed holes.
Straight Flute Reamer
- Features: The flutes run parallel to the axis of the tool. Cutting edges are straight and stationary (non-spiral).
- Best For: Materials that create short, discontinuous chips (like cast iron, bronze, or other brittle materials). The straight flutes provide maximum tool rigidity and do not “pump” chips out aggressively.
- Pros/Cons: Very stable cutting action and simple design. Excellent for through-holes in cast or non-ferrous metal. However, they are less effective at evacuating long stringy chips, and may require better coolant flow. They also impart a uniformly axial cut, which can sometimes cause bit deflection in harder materials.
Spiral Flute (Helical) Reamer
- Features: Flutes spiral around the body. There are right-hand and left-hand versions (depending on which way chips are directed when the tool spins).
- Chip Evacuation: The spiral flutes act like an auger to pull chips out of the hole. Right-hand spiral flutes (most common) push chips forward out of a through-hole. Left-hand spirals pull chips back up the hole, making them ideal for blind holes.
- Applications: Used when chip evacuation is important – e.g. reaming long holes, blind holes, or ducts prone to clogging. Spiral reamers also help reduce chatter and can produce a smoother finish in ductile metals.
- Pros/Cons: Better chip control and smoother cutting. Frequently used in reaming aluminum, mild steel, and other tough, ductile materials where chips might otherwise jam. One drawback is slightly reduced rigidity compared to straight flutes. For blind holes, a left-hand spiral is typically used so that rotation draws chips out from the bottom.
Reamer Materials and Coatings

The material and coatings of a reamer greatly affect its performance and longevity:
- High-Speed Steel (HSS) Reamers: These are the most common and economical. HSS reamers (often with some cobalt content, e.g. M42) are tough and can handle a wide variety of steels and softer alloys. They are suitable for general-purpose reaming at moderate speeds. HSS is forgiving if chattering or misalignment occur.
- Carbide Reamers: Made from solid tungsten carbide, these are much harder and more rigid than HSS. They hold their edge far longer and can run at higher speeds. Carbide reamers are ideal for high-volume or high-precision work, especially on harder materials (stainless steel, hardened alloys). The downside is higher cost and brittleness (they are more prone to chipping if overloaded).
- Cobalt Reamers: Often alloyed with HSS (like M42 containing ~8% cobalt). These combine increased hot hardness with the toughness of HSS. Cobalt reamers are a middle ground, good for abrasive or tough materials such as heat-treated steels.
- Specialty Reamers: (e.g. ceramic or diamond-tipped) are used in niche cases (e.g. abrasive composites, very hard steels), but are less common.
Coatings: Many reamers use surface coatings to enhance performance. Common reamer coatings include:
- TiN (Titanium Nitride): A classic gold-colored coating. It reduces friction and extends tool life for general steel work.
- TiAlN (also called AlTiN): A dark gray/black coating that handles high heat. It’s ideal for high-speed cutting and hard alloys because it forms an oxide layer to resist wear.
- TiCN (Titanium Carbonitride): Offers higher hardness than TiN and is good for hard steels and stainless steel.
- CrN (Chromium Nitride): Silver-gray coating that resists galling – used for non-ferrous metals (aluminum, brass).
- DLC (Diamond-Like Carbon): Extremely low-friction, great for sticky materials (aluminum, plastics).
- ZrN (Zirconium Nitride): Similar to TiN, good for aluminum alloy machining.
- AlTiSiN, AlCrN, etc: Advanced coatings for the toughest applications (high wear, aerospace alloys).
Choosing the right coating depends on the workpiece material and the expected cutting conditions. For example, a carbide reamer with TiAlN or AlTiN can withstand high temperatures needed for hard steel, while an HSS reamer might use TiN for simple steel jobs. In general, coated reamers significantly outperform uncoated ones in abrasive or high-speed work.
How to Choose the Right Reaming Tool
Selecting the optimal reamer depends on multiple factors. Consider the following:
- Hole Type (Through, Blind, Taper):
- Through holes: All reamer types can work, but straight-flute reamers or right-hand spiral reamers are common. Through-holes are easier to ream because chips exit freely.
- Blind holes: Use left-hand spiral reamers to pull chips out of the bottom. Also ensure the reamer tip has enough clearance at the bottom to avoid scraping. Blind holes require good coolant flow and chip evacuation (spiral flutes help with this).
- Tapered holes: A taper reamer (like a Morse taper or Jarno reamer) is needed to produce the correct angle.
- Workpiece Material:
- Steel (mild/hard): HSS reamers with TiN or TiAlN coatings are common for general steel. For harder steels or high production, carbide or cobalt reamers perform better.
- Stainless steel: Because of its hardness and toughness, a carbide reamer is often recommended. If using HSS, a high-cobalt grade with a TiCN/TiAlN coating is advisable.
- Cast iron: Brittle with short chips—straight-flute HSS reamers work well (spirals may clog on flaky cast iron).
- Aluminum and Soft Alloys: Use HSS reamers; consider CrN or ZrN coatings. Spiral flutes are useful to clear long chips.
- Plastics or Wood: Generally low cutting forces; HSS or even mild steel reamers suffice. DLC coatings can improve tool life with sticky plastics.
- Tolerance Requirements:
- Standard tolerance: A basic HSS straight-flute reamer may suffice.
- High-precision holes: Choose a high-quality ground reamer (often carbide or premium HSS) and consider a spiral flute for smoother finish. Also, the cutting conditions (speed/feed, coolant) must be optimized for maximum precision.
- Production Volume:
- Prototype/low volume: An adjustable reamer or HSS reamer might be used for flexibility. For one-off holes, a hand reamer could even be acceptable.
- High volume: Invest in carbide or solid reamers to maximize life and consistency. Automated processes (CNC) will favor machined reamers, possibly with multiple passes or multi-flute designs to balance speed and finish.
- Machine Type:
- Manual (hand drill or manual lathe): Use hand reamers or basic machine reamers at slower speeds. Ensure straight reaming (no torque reversal) and good tool alignment.
- Drill Press: Chucking reamers work, but keep speeds low (often half the preceding drill speed). Use adequate lubrication.
- Lathe or Mill: Both straight and spiral reamers can be used. Through holes in lathes often use straight flute reamers; blind holes use spiral with proper feed direction. Align the reamer on center.
- CNC Machining Center: Can program drilling + reaming sequence. Use high-quality reamers (often carbide) with appropriate feeds. CNC enables precise alignment (e.g. using a reamer holder or aligning collet) for best accuracy.
In practice, machinists often start by considering the material, hole diameter, and tolerance needed. For instance, [10] notes that “most machinists pick a reamer based on the material being cut, the hole diameter, and how tight the tolerance needs to be.” From there, one chooses flute style and construction: e.g., choose a spiral flute for aluminum or blind holes, a straight flute for cast iron, and select HSS vs carbide based on hardness and volume.
Straight Flute vs Spiral Flute Reamers
| Straight-Flute Reamer | Spiral-Flute Reamer | |
|---|---|---|
| Geometry | Flutes parallel to axis; many cutting edges evenly spaced. | Flutes form a helix (right-hand or left-hand orientation). |
| Chip Evacuation | Relies on coolant to carry chips out; best for short, broken chips. | Actively moves chips: right-hand spirals push chips forward, left-hand pull them back. |
| Use Cases | Best for brittle materials (cast iron, bronze) and through-holes. Very stable cutting (no axial screw effect). | Ideal for ductile metals (steel, aluminum) and blind/deep holes; helps clear long chips and reduce plugging. |
| Finish Quality | Good finish but can chatter if chips clog. | Often yields smoother finish due to continuous chip removal; reduces vibration. |
| Rigidity | More rigid (no spiral flexing); simpler to manufacture. | Slightly less rigid; more expensive to make. |
| Applications | Through-hole machining, batch work in castings, drilling holes in supporting jigs. | Blind holes, keyways or interrupted cuts (spiral reamer stays centered in keyway), high-volume automotive and aerospace components requiring fine finish. |
In summary, straight-flute reamers are chosen for simplicity and stability when chips aren’t an issue, while spiral-flute reamers are selected to control chip flow and improve finish in challenging hole conditions.
Common Reaming Problems and Causes

Even small errors can ruin a reamed hole. Common issues include:
- Oversized or Tapered Hole: If the finished hole is larger than expected or conical, it could be because the pre-drilled hole was already too large, the reamer was worn, or the tool deflected during cutting. (Reamers will follow any offset; if the pilot hole was off-center or tapered, the reamed hole will be too.)
- Poor Surface Finish: A rough or chatter-marked wall often results from vibration, too high a feed rate, or chips not clearing properly. Chatter often appears as axial striations. Solutions include reducing feed, improving clamping rigidity, and using a flute design (spiral or chip-breaker) suited to the material.
- Chatter Marks: Closely related to finish issues, chatter indicates instability. It may require changing speeds or using a different reamer geometry. Ensuring the machine and workpiece are firmly secured is critical.
- Tool Wear or Chip Packing: A dull reamer or packed flutes cause many problems. Worn edges will gradually drift hole size out of tolerance. If chips fill the flutes, surface finish drops and heat builds up. Prevent this with ample coolant flow and by swapping to a new reamer once it shows wear.
- Misalignment: If the reamer is not perfectly coaxial with the hole, or if the hole was drilled misaligned, the reamed hole will not be straight. (Unlike a boring bar, a reamer can’t correct a crooked hole.) Always take care to align the reamer with the drilled hole axis, especially in a drill press or machine spindle.
Understanding the cause helps avoid these faults. For example, leaving the correct drilling allowance (undersize) prevents the reamer from rubbing, and using cutting fluid prevents heat and chip welding.
Best Practices for Using a Reamer
To get the best results from reaming, follow these guidelines:
- Correct Speed and Feed: Use a slower spindle speed (often half the drill speed) and moderate feed. Too slow or too fast can cause rubbing or chatter. [Sundicuttingtools recommends balancing speed/feed for material: higher for soft metals, lower for hard steels.] Always consult tooling charts for recommended RPM/Feed based on reamer diameter and material.
- Use cutting fluid: Apply plenty of lubricant or coolant when reaming, especially in steel or deep holes. Coolant helps carry chips out and keeps the tool cool. Lack of coolant can cause chip drag and poor finish.
- Alignment (Centering): Ensure the reamer enters the hole perfectly aligned. Even minor tilt can ruin the tolerance. For machine reaming, use a rigid tool holder and proper chuck or collet. When hand reaming, the taper on the tool helps alignment, but caution is still needed.
- Spindle Direction: Only run the reamer in the correct direction! For spiral reamers, right-hand reamers turn clockwise (from the driver’s side) and left-hand turn counterclockwise. Running a spiral reamer backwards will dull the cutting lips. Never reverse the spindle while the reamer is engaged – always withdraw the reamer at full speed. (Reversing a reamer can ruin its edges.)
- Do Not Overload: Remember, reaming is a light cut. Force, hammering, or pushing too hard will deflect the tool. Gently feed it; the design of the reamer does most of the cutting.
- One-Pass vs Multiple: Generally reamers are designed for one uninterrupted pass. If necessary, retract periodically to clear chips. For very long holes, you may ream in stages (especially with deep holes where chips pack easily).
- Inspection: After reaming, always measure the hole to confirm size and finish. Checking with a bore gauge or plug gauge will ensure the job meets spec. This feedback also tells you when the reamer is wearing out (gradual oversize indicates dulling).
Following these practices will help produce consistently accurate, smooth holes.
Reamer vs Drill Bit vs Boring Tool
| Feature | Drill Bit | Boring Tool | Reamer |
|---|---|---|---|
| Purpose | Create a new hole by removing bulk material. | Enlarge or correct an existing hole. | Finish an existing hole to precise size and finish. |
| Material Removal | High (creates the hole). | Moderate (corrects size, alignment). | Low (finishing cut only). |
| Accuracy | Rough to moderate (±0.1–0.3 mm). | High (±0.02–0.05 mm). | Very high (±0.005–0.02 mm). |
| Surface Finish | Relatively rough (poor finish). | Good, but usually not as smooth as reamed. | Very smooth and polished. |
| Typical Use | Initial hole creation, fast removal (bolts clearance holes). | Resizing/correcting holes (large diameters, misalignments). | Final finishing on precision holes (bearing bores, dowel pins, alignment holes). |
| Sequence | First (drill hole) | Between drilling and reaming if hole is significantly off-size. | Last (after drilling/boring). |
Drills are fast and general-purpose; boring tools (single-point bars or heads) provide moderate precision on holes larger than a drill can easily handle; reamers yield the finest accuracy and finish. Often a hole is drilled undersize, then bored (if needed), then reamed for the final dimension. If extreme precision isn’t required, drilling alone may suffice. But for high-precision fits, skipping reaming leads to misfit parts.
Industries That Commonly Use Reamers
Reamers are ubiquitous in sectors where tight tolerances and smooth bores are essential. Examples include:
- CNC Machining / General Manufacturing: Almost any precision metal part shop uses reamers for finishing holes in custom components.
- Automotive: Engine blocks, transmission housings, steering and suspension parts all have dowel pins and bearing seats that need reaming. Automotive reamers are specifically made for tie rod ends, ball joints, etc..
- Aerospace: Aircraft components (landing gear, structural parts) and turbine engines require exact bores for pins, valves, and fasteners. The very high tolerances in aerospace make reaming standard practice.
- Mold and Die Making: Ejector pin holes and guide bushings in injection molds and press dies must be finished by reaming to ensure alignment of moving parts.
- Medical and Dental: Surgical instruments and implants often need precise, smooth holes (e.g. for screws or pinning components). Specialized reamers (sometimes diamond-coated) produce the required finishes.
- Energy & Oil & Gas: Pump and valve bodies, hydraulic parts with precision cylindrical bores.
- Tool & Die: Reamers are needed to finish jigs, fixture holes, and tool components to exact fits.
In each of these industries, reaming is an “unsung hero” that delivers the required hole quality.
Summary
In precision machining, reamers are indispensable for finishing holes to exact tolerances and smooth surfaces. We reviewed the major reamer types (hand vs machine/chucking, adjustable, expansion, taper, straight flute, spiral flute) and their specific uses. The choice of reamer depends on the hole type, work material, and required accuracy. For example, straight-flute reamers are favored for brittle materials and simple through-holes, while spiral-flute reamers are used for ductile metals and blind holes. Material choices (HSS, carbide, cobalt) and coatings (TiN, TiAlN, etc.) further tailor performance.
When selecting a tool, consider the drilling allowance (the hole should be slightly undersize before reaming), the reamer’s alignment, and cutting conditions. Keep feeds and speeds appropriate, use coolant, and monitor tool wear. By following best practices and choosing the right reamer for the application, you can achieve high-quality holes with excellent roundness, surface finish, and consistent diameter across many parts. Ultimately, reaming bridges the gap between raw drilled holes and the precise, functional bores needed in assemblies.
FAQ
What is the difference between a hand reamer and a machine reamer?
A hand reamer has a square drive end and a long tapered lead-in, and it is operated manually (often with a tap wrench). It’s ideal for light, on-the-spot jobs. A machine reamer (chucking reamer) has a cylindrical shank for a drill or lathe, and it cuts immediately at the tip. Machine reamers are more rigid and precise, making them better for production and tighter tolerances.
What type of reamer is best for stainless steel?
Stainless steel is hard and can work-harden, so it’s best reamed with a carbide reamer. Carbide holds its edge well under the heat and abrasion of stainless. If using HSS, choose a high-cobalt grade and consider coatings like TiCN or TiAlN to resist wear.
When should you use a spiral flute reamer?
Use a spiral (helical) reamer when chip evacuation is critical, such as reaming deep or blind holes, or when machining ductile materials that form long chips (aluminum, mild steel). Also use spiral reamers for holes with keyways or interrupted cross-sections, since the spiral design keeps the tool centered and prevents it from snagging. For blind holes, a left-hand spiral reamer is often chosen to pull chips out of the bottom.
Can a reamer enlarge a hole significantly?
No. A reamer is a finishing tool only. It removes a very small amount of material (typically tenths of a millimeter) to refine a hole. To significantly enlarge a hole, you would use a drill bit or boring tool first. Reamers are not intended for major size changes.
What is the difference between reaming and drilling?
Drilling is the initial hole-making process, using a twist drill to cut out most of the material. The resulting hole is usually rough and only moderately accurate. Reaming comes after drilling: it refines the drilled hole to a precise diameter and smooth finish. In short, drilling makes the hole; reaming perfects it.
How do you choose the right reaming tool?
Consider the material, hole type, and tolerance. First choose the reamer material (HSS vs carbide) suitable for the metal being cut. Decide on flute style: straight for brittle materials, spiral for ductile or blind holes. Match the tool diameter to the final hole size. Pick a hand reamer only if machining by hand; otherwise a machine (chucking) reamer is best for accuracy. In production, balance precision with cost and speed (e.g. using a carbide reamer in automated CNC for tight tolerance, or an adjustable reamer for one-off fits). Consulting tooling charts and manufacturer guidelines for speeds, feeds, and coatings will ensure you select the optimal reamer for the job.